Security settings that can be changed per application
Note
Note that the setting here only apply to the selected application, they are not global.
Where to change:
Open “Developer mode”
Edit the desired application
Navigate to the “Security tab”
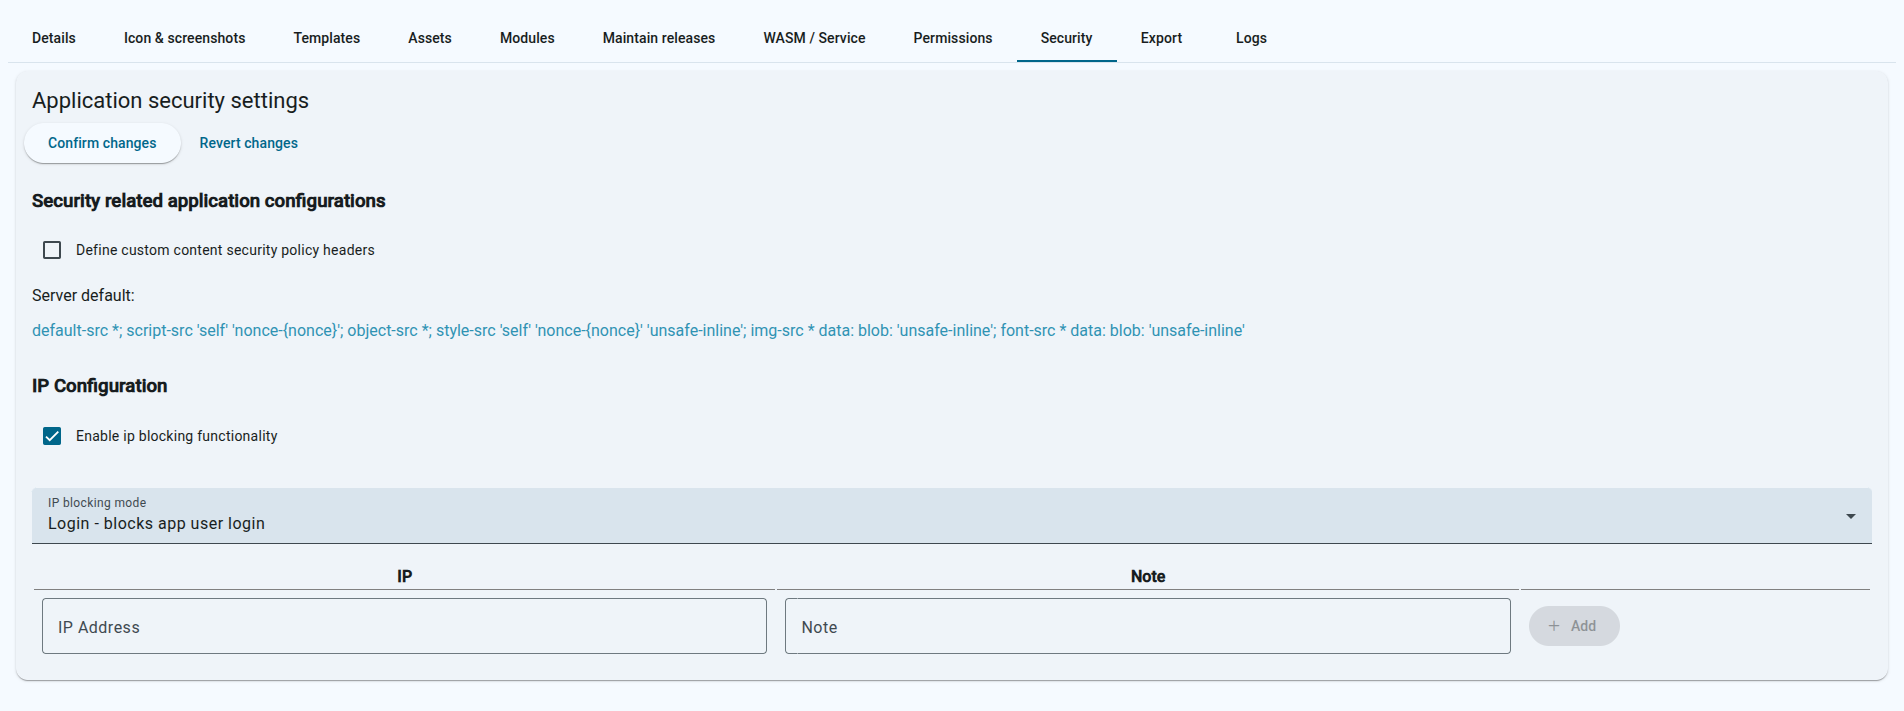
Custom CSP rules
The server will apply a default CSP ruleset (shown below), but you can disable this in the application security settings and provide a custom one instead.
The changes here will only take effect for the edited application.
It’s possible to also start blocking access to the application routes (or app user login) by IP.
The settings here work as a whitelist, this means when enabled without any ip inputs then all accesses are blocked.
Enter the allowed IP’s and an optional note who the IP belongs to.
When done then don’t forget to click on the “Confirm changes” button.
There are 2 modes for the blocking functionality:
Login block
This mode does not prevent access to view the pages but does block the app users from logging in.
View block
This mode blocks views of the pages entirely.
Subsections of Security
Permissions
Application permissions
The application permissions are used to control access to the application features. The permissions are defined in the application permissions file and can be assigned to app users by their groups.
Currently this works with app users only.
App users groups
Groups are used to assign permissions to app users. A user can have multiple groups.
Use the api to set the groups value for the users. The groups value is free text field that can have any value.
Permissions file
Create the ‘permissions’ type file in the application. The contents of the file are in json format.
First field is the type of the permissions (ex: UI)
Second field is the group name. This can be any value and is checked againts the current app user. If the current user does not have the group assigned then the given permission
action will be applied.
Ui rules alter the ui elements based on the defined rules. The rules are applied in the order they are defined in the permissions file.
Note
Currently the feature supports the following nodes: “input”, “button”, “a”, “form”, “div”, “select”, “textarea”, “aside”, “ul” and “label”
Element
The element field is a css selector that is used to select the elements that the rule will be applied to. The selector is applied to the entire application page, so it can be used to select any element on the page.
We can select by dom element, class or id. For example:
#email - selects the element with id “email”
.submit-btn - selects all elements with class “submit-btn”
button - selects all button elements
Action
The action field defines what will be done to the selected elements. The available actions are:
remove-no-group, remove - removes the element if the current user does not have the group assigned
remove-has-group - removes the element if the current user has the group assigned
add-class-no-group, add-class - adds a class to the element if the current user does not have the group assigned, class name is defined by the “class” field in the rule
add-class-has-group - adds a class to the element if the current user has the group assigned, class name is defined by the “class” field in the rule
Class
The class field is used to define the class name that will be added to the element when the action is “add-class”. This field is required when the action is “add-class” and is ignored for other actions.